This was an update of my Bougainvillea Pre-Bonsai 2 Progression Seires.
 |
| Back View |
 | |||
| Close up view of the lower trunk |
 |
| Front View |
I decided to work on this specimen before the fungus comes back and attack again. On this post, I will share to you some things that I had done to prevent the problem that it had before and also some carving techniques that I use. As I am looking at this bougainvillea, the first thing that comes in my mind is to apply a fungicide like lime sulfur. It is a mixture of calcium and polysulfides which is used as pest control. This mixture will also greatly enhance the appearance and character of the natural shari (barkless part of the trunk).
This bougainvillea specimen also had several flaws that need to be fixed like the two large cuttings that I made on the upper part of the trunk.
I will also work on some minor carvings on the lower trunk and enhance it a bit more.

 |
| Brush and carving bits |
 |
| Sanding Stones |
 |
| Power Tool |
So let's begin and get our hands dirty. These are some of the tools and accessory attachements that I will be using. I like to use these tools because it will only give a very minimal stress to the tree or non at all. Unlike those typical hand tools used by wood carvers it uses so much force to drive those mallet and chisels. By the time you are finished carving, the tree already experienced so much stress which might cause the tree to be unhealthy and you also have a great chance of loosing it. Make sure that you have the proper protective gear like a safety glass to protect your eyes from those flying bits and pieces of barks that might poke into your eyes.
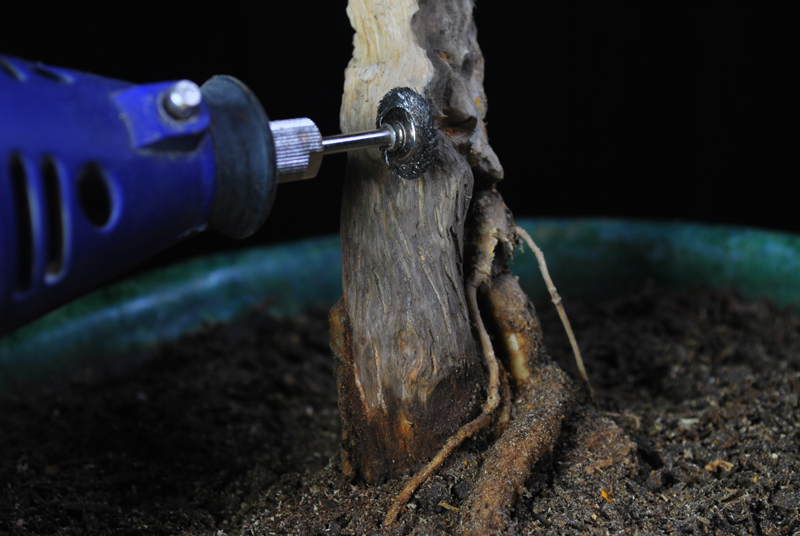
First, I removed all the loosed barks by using a wire brush. Just give it a light and small strokes and be sure to run the brush in line with the grain to give it a natural look.
 Then I started carving a part of the trunk that needs some refinements. There are really no secret rules or techniques on how to perform deadwood carvings on your tree. It is your own imagination that will tend to produce an interesting output. The important thing to know when performing deadwood carving is to have some understanding on how it decays on a natural environment. The best thing to do is to look for some trees around your place or even search on the internet for pictures of deadwood and try to mimic those. Don't be afraid to make mistakes. Be creative, make your imagination run wild and the most important part is to have fun while doing it.
Again using the brush to blend all those details.
Giving it some more details and refinement.
These are the before and after images after the carving and the lime sulfur is applied. Added and mixed some color pigments with the lime sulfur. The typical effect of lime sulfur is bleaching the wood to produce a bony white color and so by adding color pigment you can produce a hue of color you want. You can also try adding coffee, tea, or acrylic paints that is water based. The lime sulfur is still wet though but you can already see a great difference.
And Wallah!!!! The final output.
I hope you enjoy the post. Happy Bonsai growing to ALL!!!
OLDER POST ABOUT THIS SERIES:
- Bougainvillea Pre-Bonsai 2 (where it started)


1 comments:
Thaaaank u :) i really enjoy ur post and all ur blog i like and i respect ur effort
Post a Comment